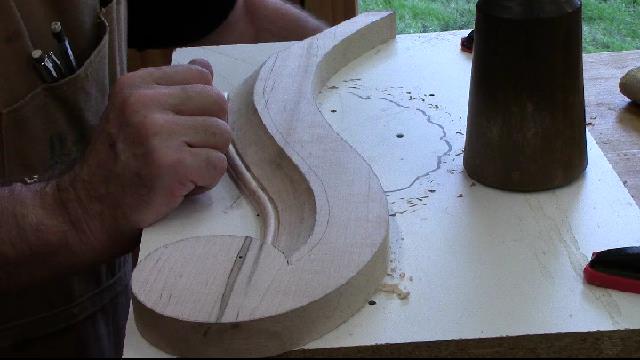
I have decided to start over on another practice gooseneck. This time I will make it with the top piece as one at 1 1/4 inch, this is the way it will be made out of cherry for the chest.
As you can see I traced the pattern on an 1 1/4 inch piece of soft maple. Then I cut away 3/8 of an inch on all but the volute. I did that on a band saw. Then I cut off the waste with a hand saw and flattened the board.
I also made a new template for the volute. This is the pattern on the chest that is at Winterthur. I like it better than the one I have been using.
I cut away the front part of the top molding because it is waste. Then with my router mounted over head to my radial arm saw I am able to cut the two rabbets along the front edge of the molding. I did not complete the rabbets, a portion will have to be carved.
I have used this overhead routing before, I have a youtube video in my channel on using it here:
https://www.youtube.com/watch?v=xTL29v_HFPY
Using the hand routing technique I used before I put a partial odgee on the molding where I could access it. This helps with the carving by having the shape to follow.
I drew a line to make a spiral for the volute, then using a hand saw I made a saw kerf all the way around the spiral. This helps with the carving.
You can see me taking off the waste around the volute. I'll have to put the pattern on again after I carve the ramp for the volute.
Below I have carved the cove and the pattern into the volute as well as extended the ogee and rabbets to the volute
Now I need to cut away the waste from the back of the molding.
I cut out the lower portion of the molding on the bandsaw and roughed out the cove with a cove router bit. This removed a lot of the waste. Here I am carving it to shape with a 1 inch #5 gouge.
Once it is flush with the 3/8 inch rabbet on the bottom I will use the router to cut out the bead.
Here I have routed the bead on the bottom and cleaned it up and extended it to the circle with carving.
So it is ready to be mated to the top piece.

I mitered the edge and tacked it to the upper chest to see how it looked. I also put a sample piece of the lattice behind the molding to help with the spacing since this lattice will be behind the entire top moldings.
The under side of the volute need two curved rows.
The pattern on the bottom is complete. Glad I practiced the carving.
I think I am ready to make the good ones out of the cherry stock. So I am going to mill the stock and get started.


No comments:
Post a Comment