Search This Blog

Friday, September 29, 2017

Mahogany Curved Blockfront Chest Mount Feet & Knee Blocks Step 5

Now that I have carved the 4 ball & claw feet, I need to mount them on the bottom of the chest.  The feet have a one inch square tenon on the top of the foot. 

I made a cardboard template to set the position of the tenon.


Then I positioned the template on the bottom of the chest and marked out where to drill the hole. I am going to use a 1 inch bit and then chop out the balance to square it up.


I used a 1 inch Forstner bit to drill the 1 1/2 inch deep hole in the bottom.


Chopping out the sides to make it square.


Paring to the line.


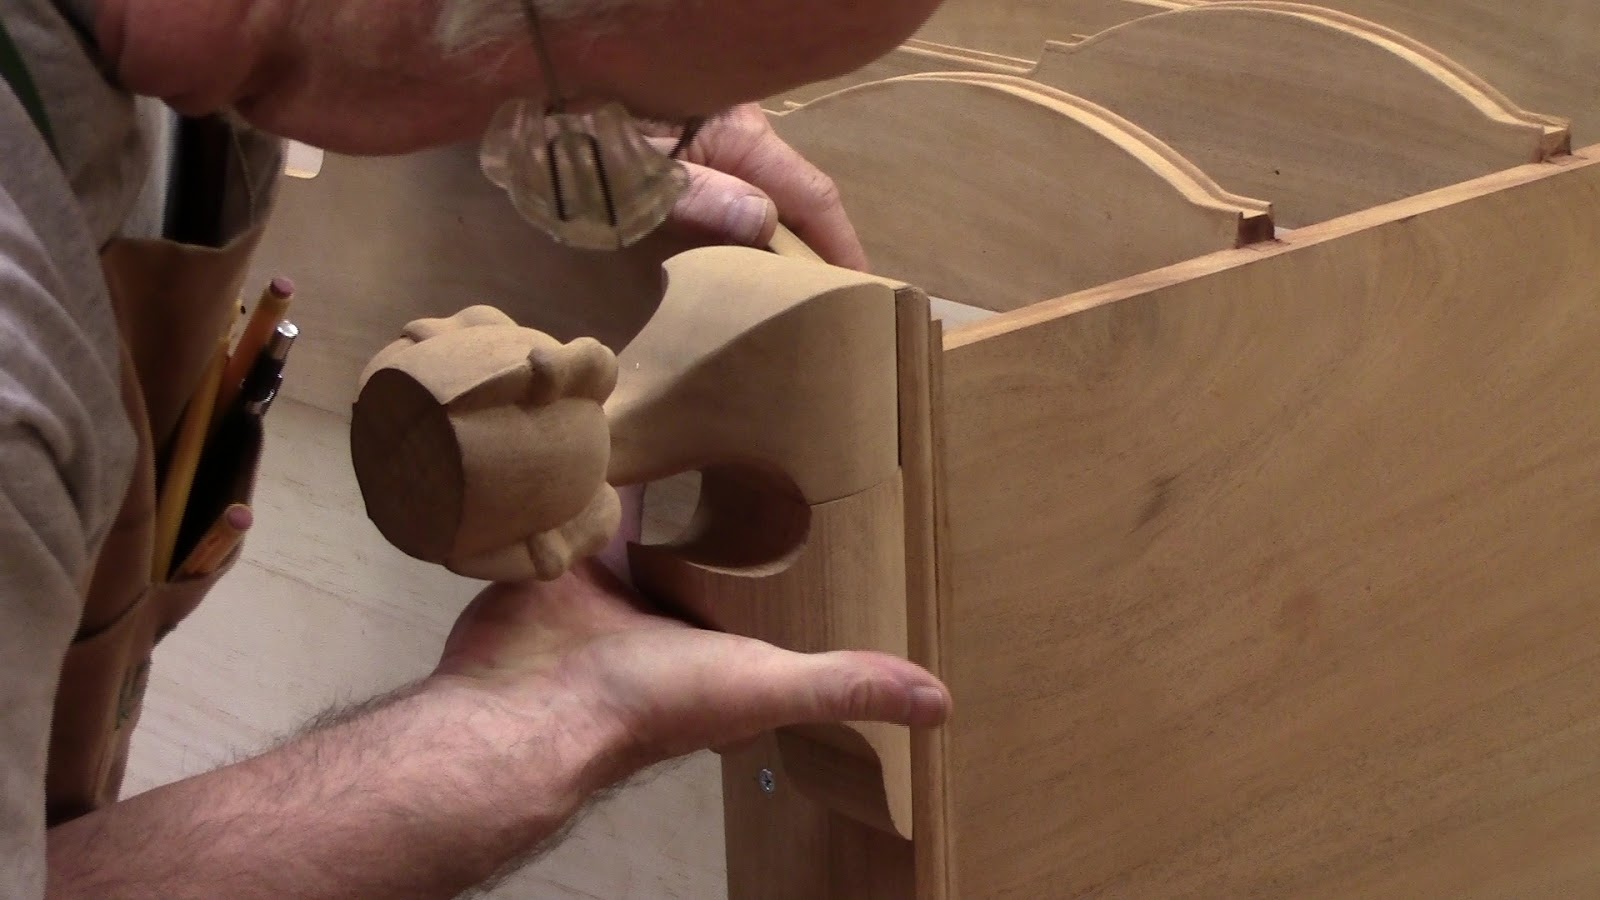
Test fit and it is nice and tight. 


Gluing and clamping the feet to the chest, I sanded them to 150 grit before mounting.


This is a photo of the knee block that I took at the Yale Furniture Study. I made a cardboard template to use for the cutout of the knee block.  You can see how much curve there has to be in both directions.


I cut out the face pattern on the band saw and then taped it back together. I positioned it on the leg and traced the curve on to the top of the block and traced the face of the curve on to the side.


I can only cut out the face curve on the band saw and will have to shape the second curve with files and rasps.

Here is the rough shape after bandsawing.


Here is the rough shape in place on the foot.


I use a pencil to trace the shape on the inside on the knee block.  It needs to follow the shape of the leg.


As you can see the shape is almost a continuous curve.  This is the shape I need to create with the rasps and files.


I put a screw in the back so I can clamp the block on my bench.


Following the pencil lines on the side I use the rasp and files to round over the block to match the curves.


This is about how it will look when I test fit using the practice foot. I am getting close to the final shape.


This test of the shape shows that I am just about complete.  Still needs a little more clean up.


The side ones are much easier because they are only curved in one direction and can be band sawed near the final shape. 

The original did not have mahogany blocks in the back. Just pine blocks which were not shaped.


That's it for now, I will glue them in place and do some final fitting to the feet. 
Next will be the side cockbeading in the drawer openings.

Here is today's video:

Thursday, September 14, 2017

Mahogany Curved Blockfront Chest Ball & Claw Foot Step 4

Time to start working on the ball & claw feet for the chest.  This foot has a short cabriolet leg and a fairly large ball and claw foot. The two side toes are curved toward the back and it has bulb knuckles. This foot is similar to others in the Boston area from that period.

I took a number of pictures of the foot when I was at Yale. Here I made blow ups so I could study them while I carved a practise foot out of poplar.


I laid out the bottom the traditional way with the 2 circles and 4 toes.  But notice on the side I traced a curved toe sweeping back on the side.


Here is a look at the other side.


Here is the practise foot. It came out pretty well, I did play with it for a while until I was satisfied that it looked ok. 


Now that I have a good model, I am ready to cut out and carve the mahogany feet.


Here they are all cut out and with the bottoms marked with the circles and toes.  I left the tops on so that it would be easier to clamp them in the vise for carving.


Again I drew the side toes sweeping back.


I use a molding gauge on the model to transfer the height of the ball with a pencil mark that I draw on the side and front. I will use the molding gauge later to check the progress on my carving of the curves.


Here I am using a 1 inch 3 to carve a cylinder all the way around the four sides.  I stop at the first circle drawn on the bottom of the foot.  I use the small square to check that the cylinder sides go straight back from bottom to top. This one has a little way to go, you can see the gap at the base of the square which means the top is high and needs more carving.


After carving the cylinder all the way around, next I start to round over the ball on the back side.  I carve from the center down toward the bottom and round to the second circle on the bottom. I carve from the center up to the top and try to make the same curve. The center on this ball is 1 1/8 inches from the bottom.  But this is where I use the molding gauge to check the curves.


There is a lot more carving to do here to match that curve from my practise foot.


Now I am getting closer. Just a little more. I repeat the process on the other side.


When you view it from the bottom the ball should look continuous as it passes under the toe. Also the curves of the ball should be smooth without bumps. 


I roughed out the side toe before I started carving the front ball because I needed to expose the portion that was hidden under the toe before I carved it.  Now I can made the ball on the front.


I carved the front ball the same way I did the back by using the molding gauge to check my progress on the curves.  I also roughed in the webbing so I could see the size of the toes.  I wanted to make them thicker than the model.


Now that I have the ball carved, I can work on the toes. From the pictures and the model I need to carve these bulbs along the toes.  I made mine similar but not exactly like the one at Yale.


With most of the carving done, it is time to clean up the saw marks off of the cabriolet leg.  I use my curved bottom spokeshave and a file to clean up the marks.


There you have it, one done and it looks better than the model. Now I have to do 3 more but they should go faster as I am repeating the process.


Here is today's video:

Thursday, September 7, 2017

Mahogany Curved Blockfront Top & Molding Step 3

After gluing up the top from book matched pieces that I resawed from 8/4 mahogany, it was time to square it up with my crosscut sled.


Now that it was cut to size 21 x 36, I need to make a sliding dovetail from a stopped front to the back.
I chose to use my radial arm saw to cut a 1/2 x 1/2 slot from back to the stopping line in the front.
There are other ways of doing this. You could use a router with a guide, table saw where you drop the board on the dado stack.  I think it is dangerous but there are people who do it.


Now I use a router with a guide to put a dovetail socket on one side of the slot.  The guide is tapered 1/16 inch from the back to the front.  This makes a loose fit in the back to a tight fit in the front. The router has a good cut on the left slot and a climbing cut on the right slot, since the dovetail is toward the outside of both slots. Be careful when cutting with the climbing cut, the router can get away from you an ruin the slot.


Putting the half dovetail on the outside of each of the case sides.  This is a straight dovetail only taper the slots.


Test fit, it takes some whacking to get it to go the last inch or so.  But that is the way it is suppose to work.  If it is too tight, I use my shoulder plane to ease a little off the dovetail.


Here is the top dry fitted to both dovetails.  Later, I'll remove it and put the edge treatment and curves on it before gluing in place.


I need to make the bottom molding. This piece is about 5 inches wide and has a round over and follows the curve on the front. I used a template I made at the start for the curves.   The ends need to be cut off and mitered for the side molding.


Before I could mount the molding, I needed to glue up the case.  Doug Moulder was visiting so we glued it up with Old Brown Glue.  Gluing was just to the bottom with the sides and the 3 drawer dividers into their sockets. The top is not glued on, I will do that later after shaping.


I milled a couple of 3 inch pieces for the side molding and mitered it in the front.  I will attach it to the bottom with screws.  Gluing the side pieces to the bottom would create a cross grain potential problem.


All clamped in place ready for the screws.


I used 1 1/2 inch #10 screws.  I will have to cut a mortise in the bottom here to attach the ball and claw foot.


Attaching the side matching cove molding with a little glue in the front and pin nail in the back using my 18th century pneumatic pin nailer.


Cutting out a practise foot out of poplar.


One foot without the tenon under the case. I need to make a template from that so I can locate where to cut the mortise.  The other foot is cut out from poplar for practise carving.  I have to curve the side toes toward the back .
Carving will be in the next post.


Here is today Video: